
Printer setup, print dialog and cheque placement
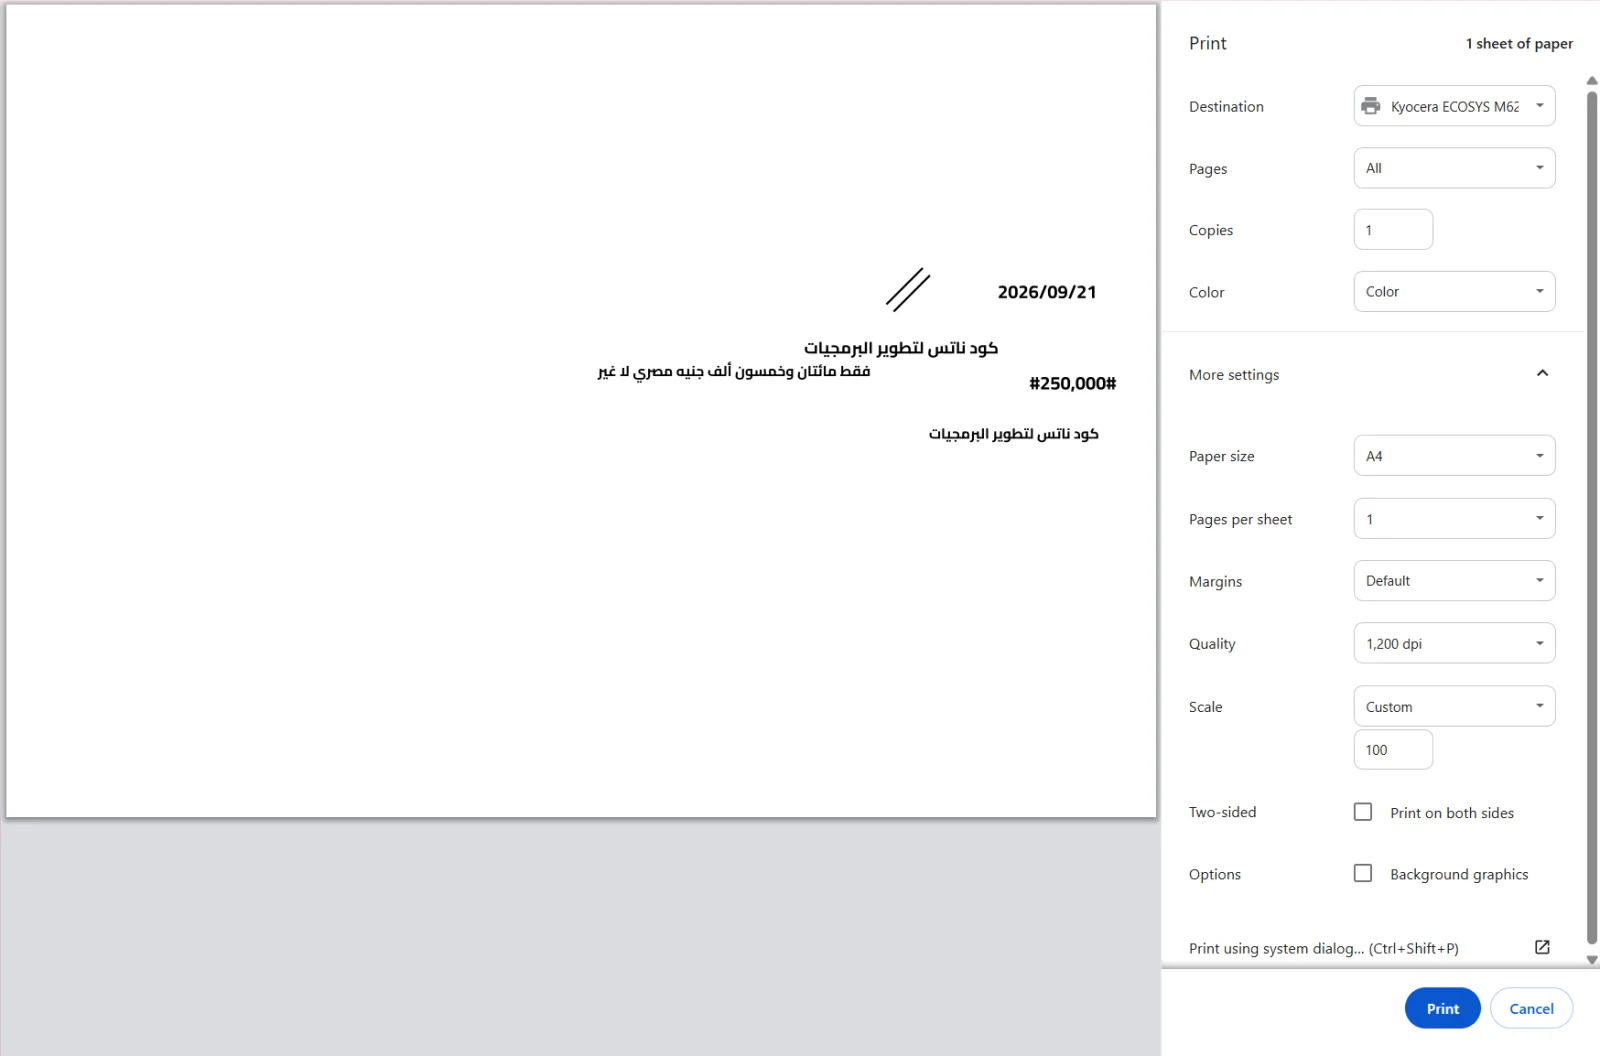
The program draws the cheque on a landscape A4 page with zero margins and pins it to the page's right edge — what is left for you in the print dialog is the printer and the scale. Set it once, then leave it alone.
Last updated: 2026-09-28
On this page
How does printing reach the printer?
When you press Print, the program opens Chrome's print dialog, where you pick the printer and send the page. Most of what matters is enforced by the program itself and cannot be changed from the dialog:
| Enforced by the program | Value |
|---|---|
| Page size | A4 — for every template, whatever the cheque size |
| Orientation | Landscape — for every template |
| Page margins | Zero |
| The cheque image (background) | Never printed — preview only |
| Sidebar, bars and dialogs | Not printed |
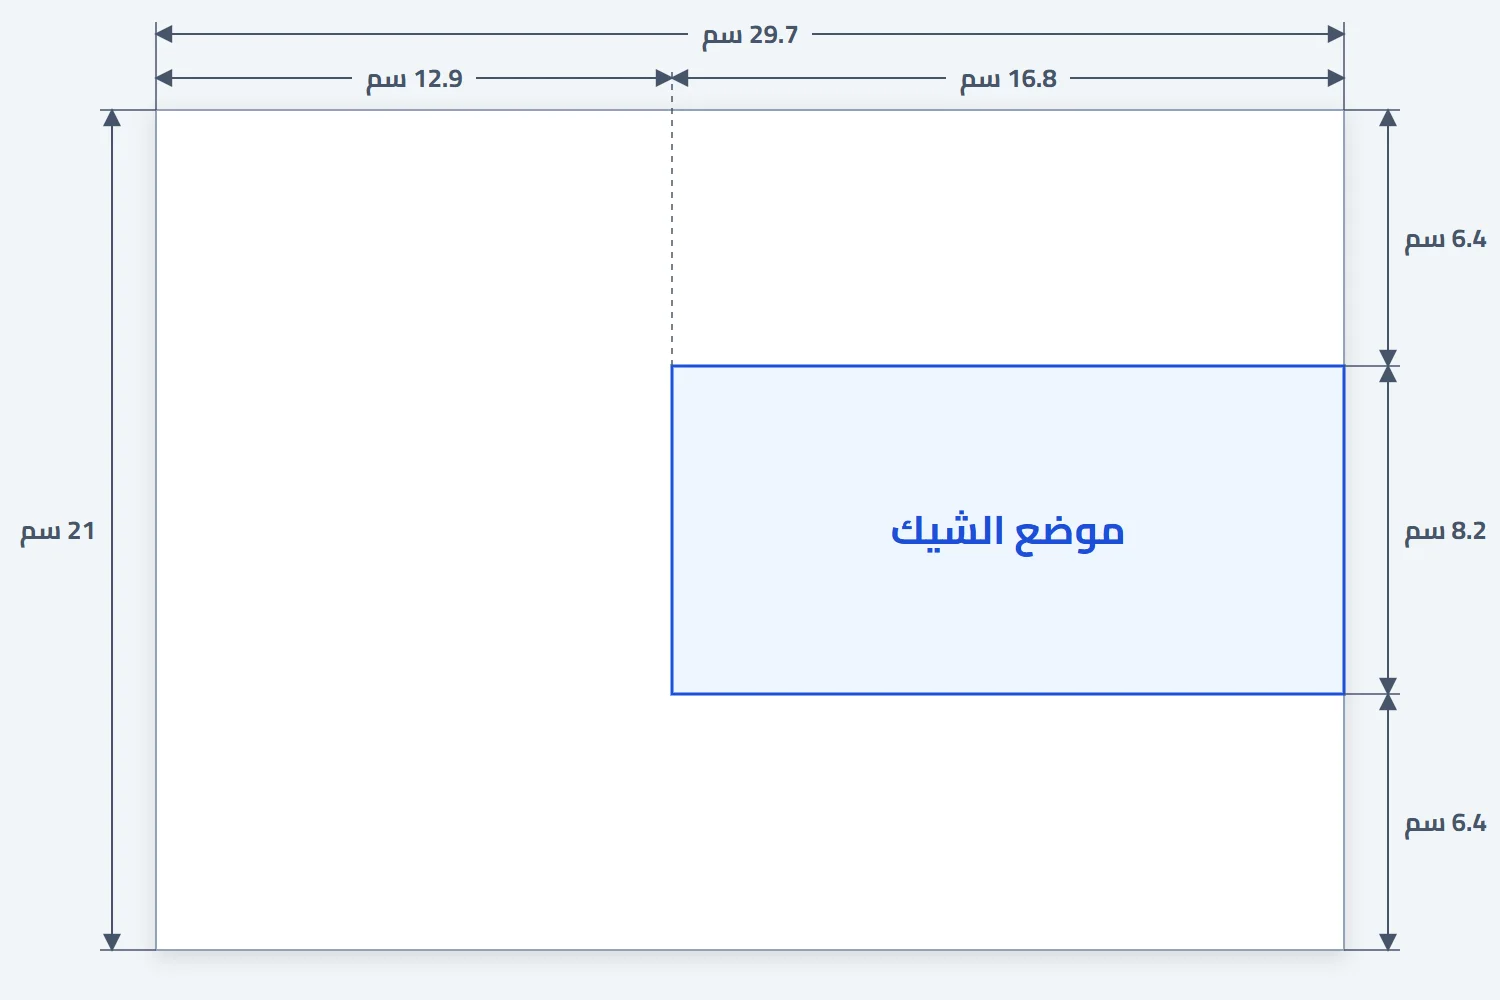
The cheque is drawn on that page against its right edge and centred vertically, at the template's dimensions in centimetres. In a batch, each cheque gets its own A4 page in the same position.
What you set in the print dialog
| Setting | Correct value | Why |
|---|---|---|
| Destination | The cheque printer itself — not "Save as PDF" | |
| Paper size | A4 — leave it as Chrome shows it | The program declares A4 explicitly; don't change it — with another size Chrome re-lays the page on a different sheet and every field on the cheque shifts |
| Margins | Default or None — both respect the declared zero | |
| Scale | Custom 100 — not "Default" and not "Fit to page" | The program does not set it; any scale other than 100 shifts the positions |
| Headers and footers | Chrome doesn't show it here | The page declares a zero margin, so Chrome hides the option altogether — no title or date is printed |
| Background graphics | No effect | The image is excluded by design either way |
ملاحظة
Chrome remembers the last settings for each printer. After the first correct print the dialog opens on them next time — but check them after any browser update or printer change.
Where does the cheque sit in the tray?
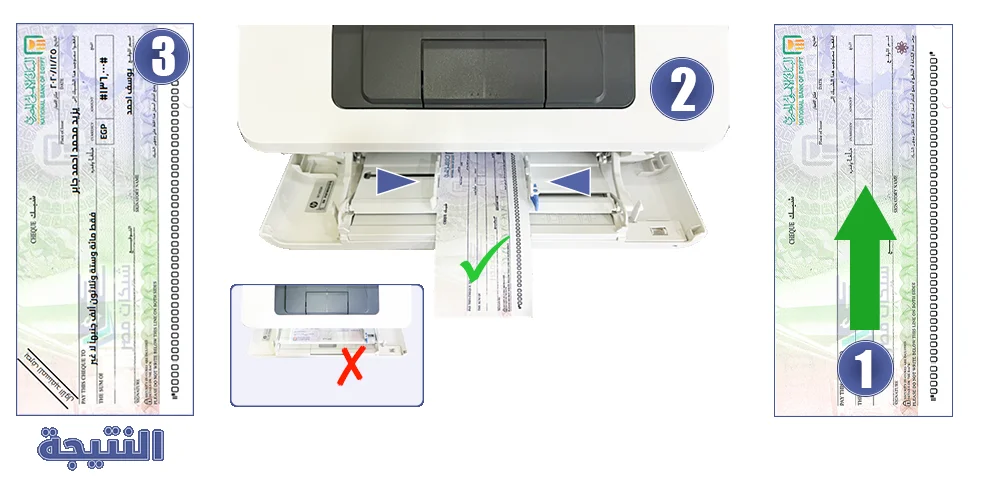
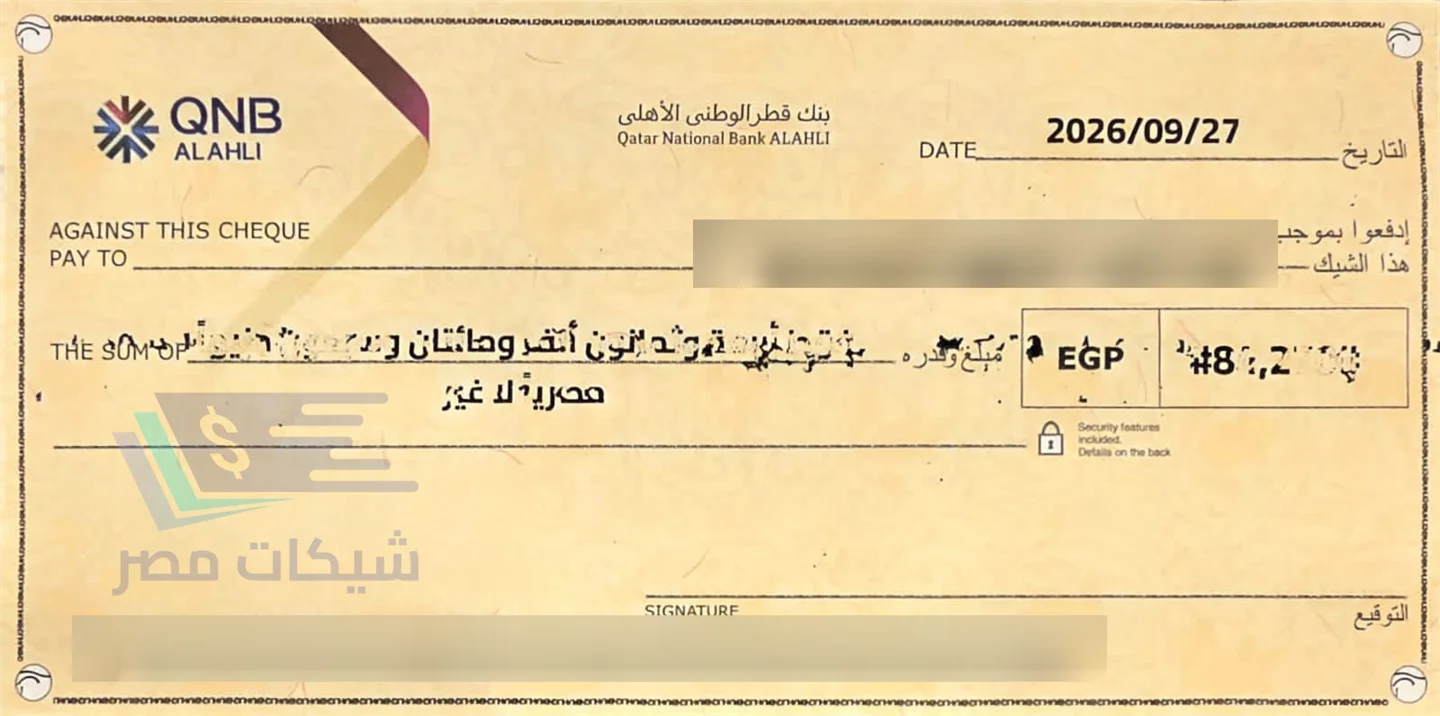
This is the only practical question. The printer thinks it is printing a landscape A4 sheet while you feed it a smaller cheque — so the cheque must sit where the program draws on that page: the right edge, centred vertically.
Find it by testing once:
- Print any test cheque on plain A4 paper (choose تالف (damaged) in the print result afterwards, or use a draft cheque).
- Lay a real cheque on the sheet where the fields came out — you now know which edge and what height.
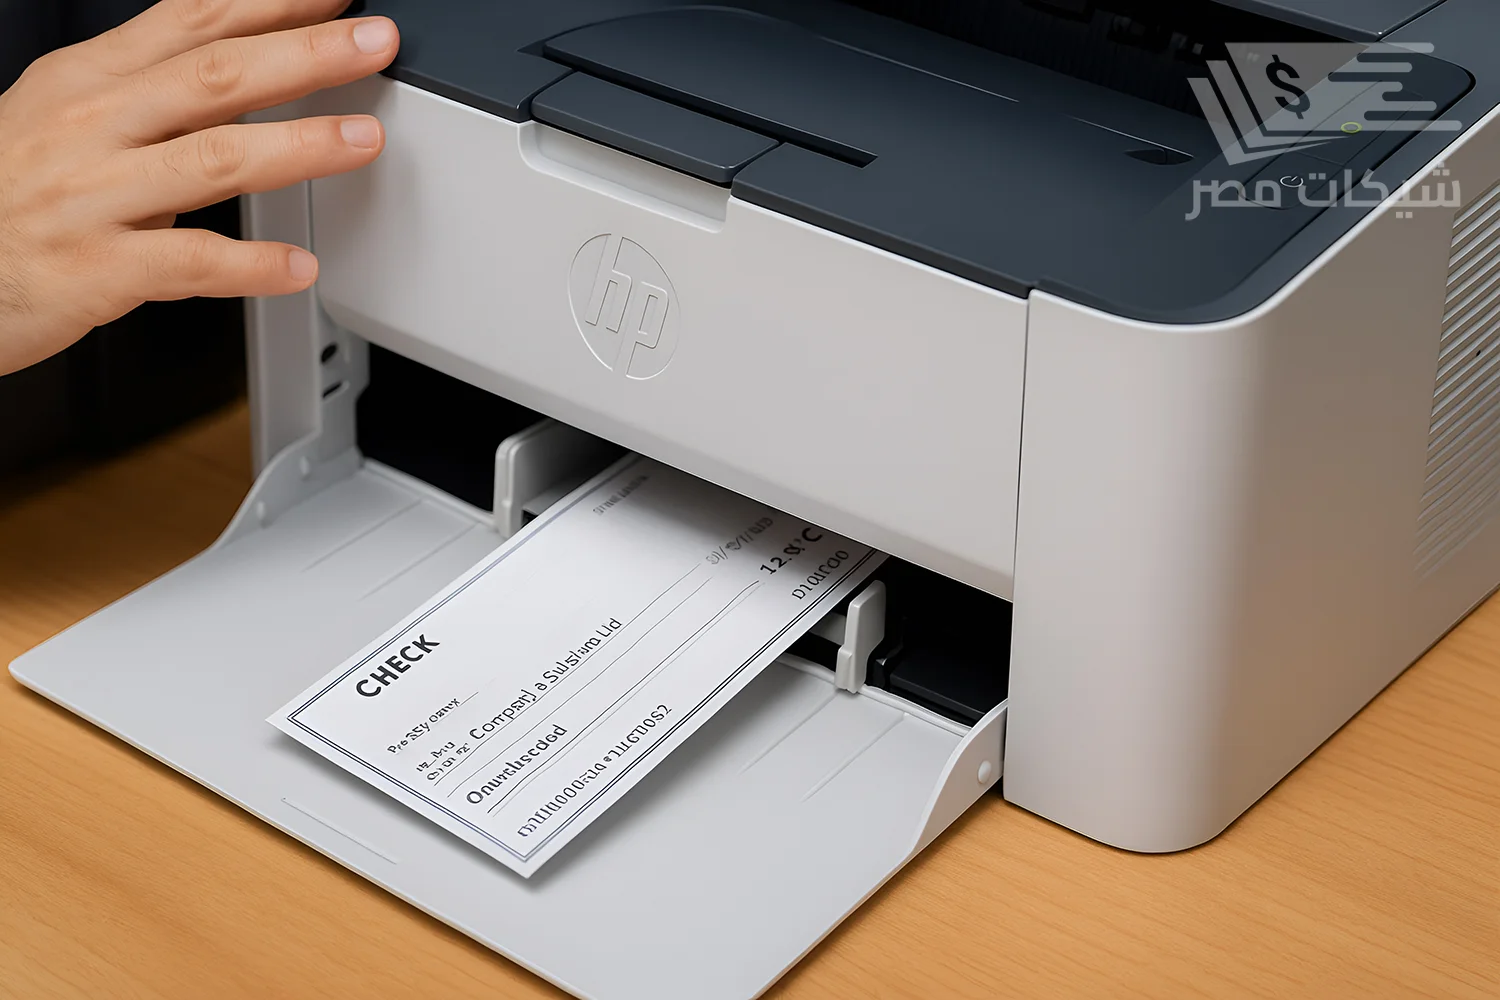
- Place the cheque in the manual feed tray in that same position, in the direction the feed arrow on the tray shows. Most trays have a side guide that slides to hold the paper against an edge — set it against the edge you found.
- Print again on the real cheque and check.
تنبيه
If all fields shift by the same amount, the problem is the cheque's position in the tray or the scale — not the template. If one particular field shifts, the problem is in the template: see Fitting a template to your chequebook.
Cheque dimensions — where do you see them?
In centimetres, in four places: clicking any field on the print screen shows a ruler with the width and height; the Cheque size (cm) column in the cheque templates list; the width and height fields when editing a template (in 0.1 cm steps); and the "Cheque size" line in the chequebook form. Measure your chequebook with a ruler and compare.
In Windows
You don't need a custom paper size — the default A4 is what's required. What is worth setting:
- The manual feed tray as this printer's default if it prints cheques only; otherwise pick it from the dialog each time.
- Normal quality; "toner saving" fades the amount in words.
- A shared network printer: settings are made on the machine that prints.
Laser and inkjet both work; laser holds positions more reliably. Any A4 office printer will do — no dedicated cheque printer is needed.
Paper type: Heavy or Thick
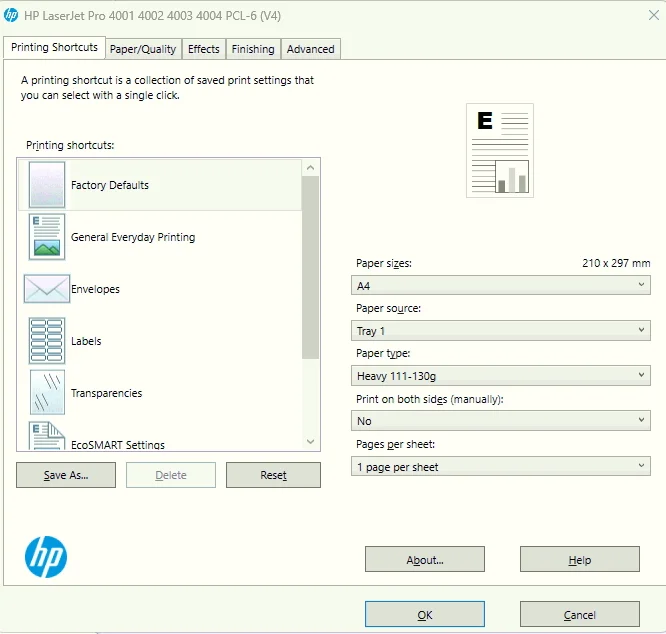
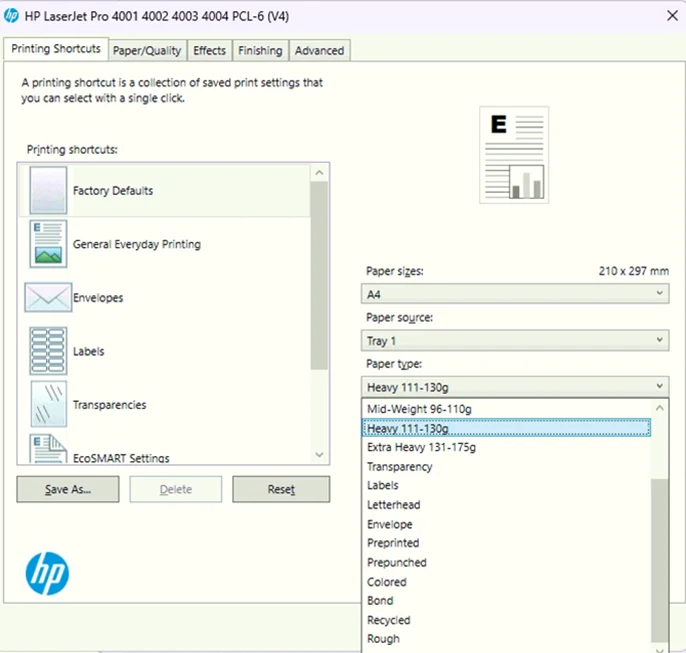
Cheque paper is thicker than ordinary paper and carries a security coating. If the printer treats it as ordinary paper, it pulls it through at plain-paper speed and the ink or toner does not fuse onto it, so the printed text comes out broken or smudged anywhere on the cheque, while the positions themselves stay correct. The problem is not in the program or the template, but in the printer's settings.
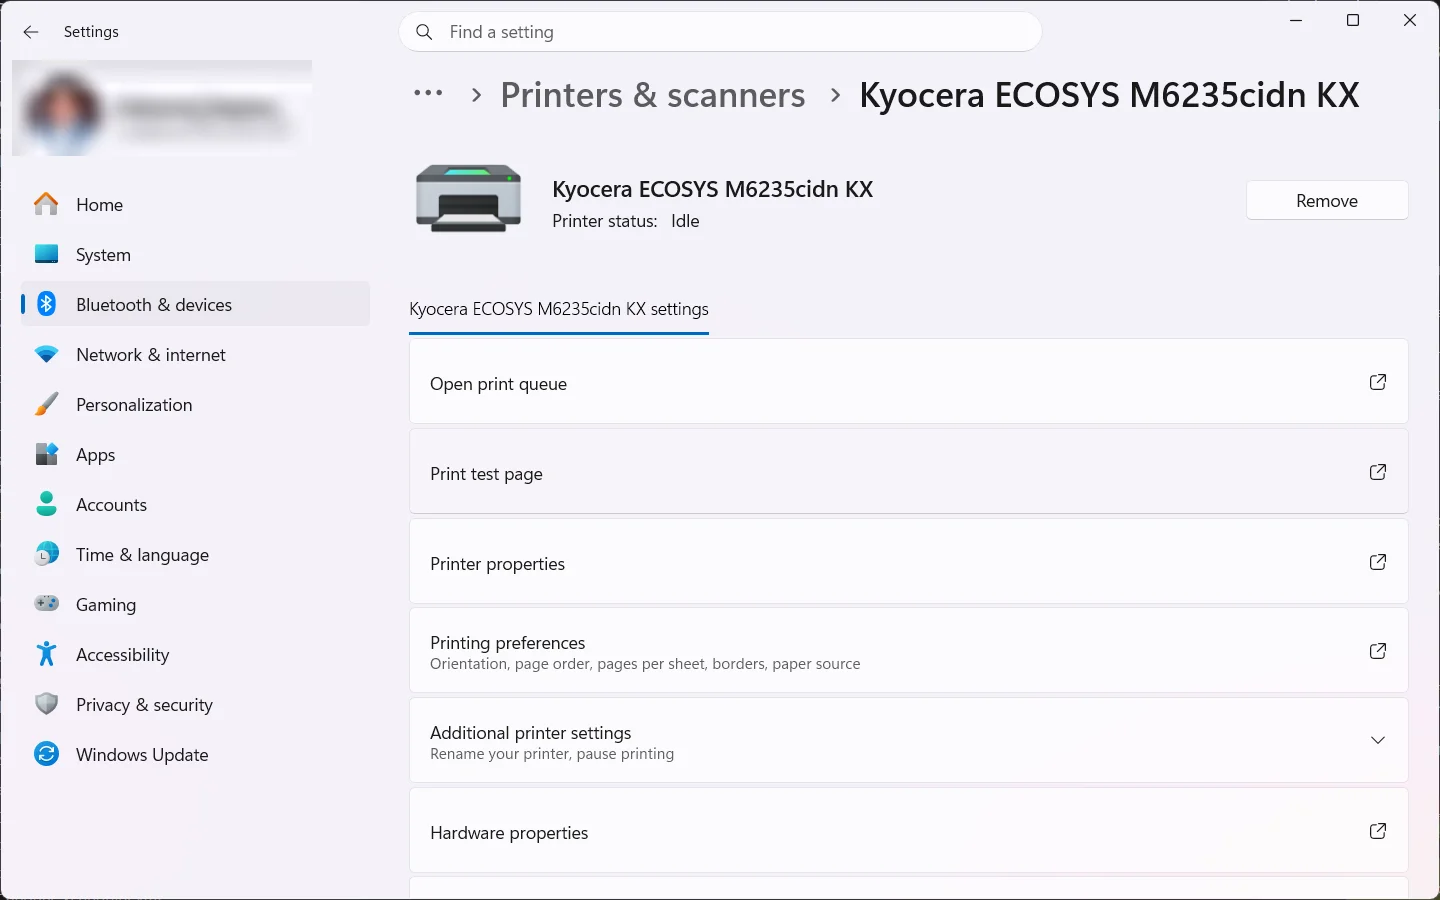
The setting lives in the printer's preferences in Windows: Settings → Printers & scanners → the printer → Printing preferences. The field's name and values differ by driver:
HP LaserJet (Printing Shortcuts or Paper/Quality tab): Paper type → Heavy 111–130g. If the breaks persist, use Extra Heavy 131–175g.
Kyocera (Basic tab): Media type → Thick, with Cardstock as the alternative.
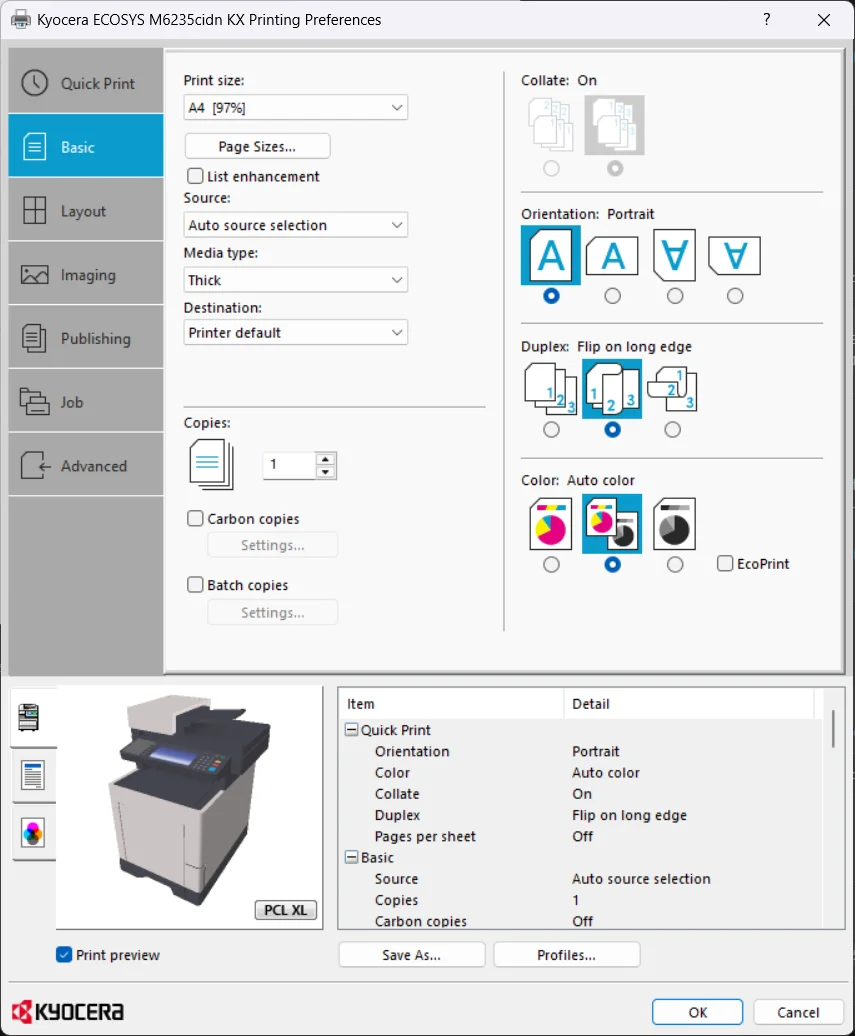
In other drivers the field is called Paper type or Media type, and the option Heavy, Thick, Cardstock or Bond.
If the printer has a manual tray (Manual / Bypass tray), use it for cheques — its path is shorter and bends the paper less.
Extra settings for text (the Imaging tab in Kyocera, and its equivalent in other drivers): turn on Print text as black so text is printed with black toner only rather than a black composed of colours, and leave EcoPrint (or Toner save) Off so the text does not come out faded.
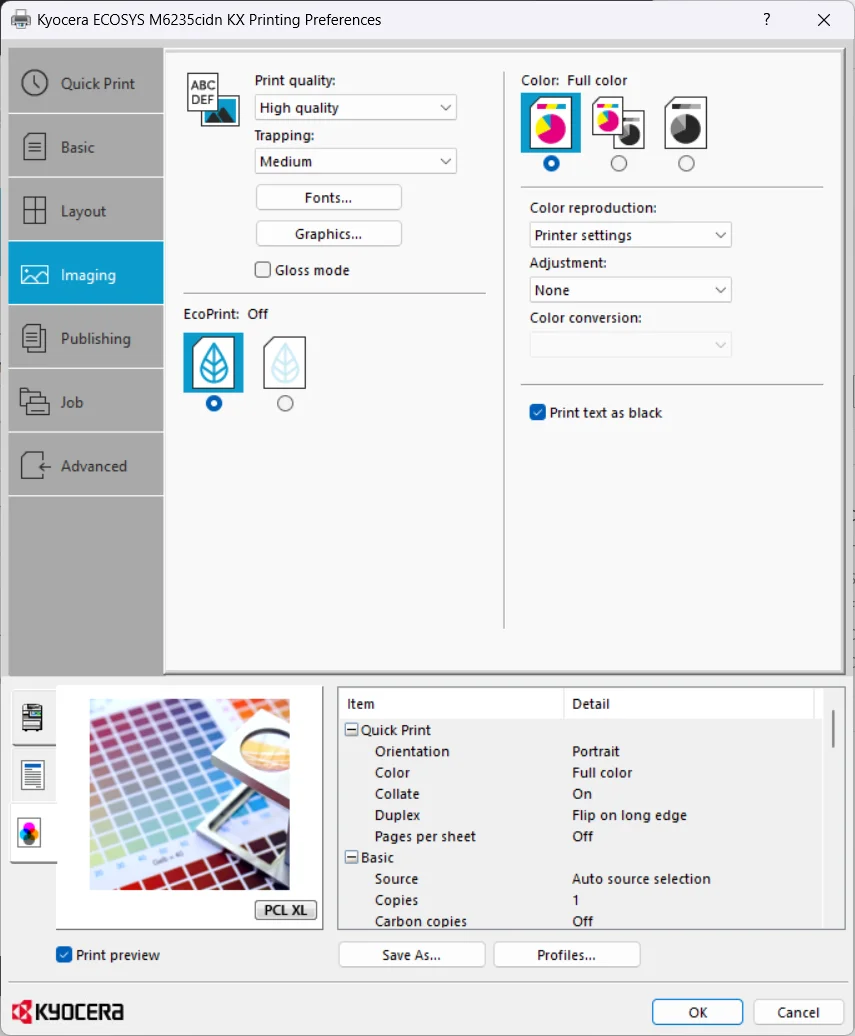
Note: this setting is per printer, so it affects everything printed from it. If the printer is shared, add a second driver for it named "Cheques" with this setting (Add printer on the same port) and choose it from the program.
Common problems
- All fields shifted by the same amount — the cheque's position in the tray, or the scale is not 100.
- Fields smaller than their places and bunched together — the scale is on "Fit to page".
- A date and title print at the top of the cheque — a browser other than Chrome adds headers; use Chrome (the option is hidden there by design).
- The printer pulls two sheets — the cheques are stuck together; separate them and load a few at a time. Record the blank sheet as تالف (damaged) — see Print result.
- The cheque comes out blank — it went in face the wrong way.
- No sheet came out at all — the destination is "Save as PDF"; a file was saved instead of printing.
Related pages
Did this page answer your question?
Thanks — your feedback helps us improve the guide.
Couldn't send — please try again shortly.